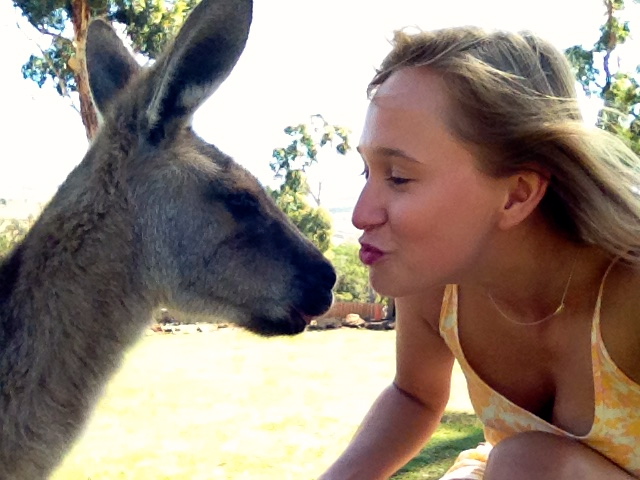
Have you dreamed of finding Nemo in The Great Barrier Reef, taking a selfie with a kangaroo, or adopting “g’day mate” and “no worries mate” as part of your everyday vocabulary? Are you under 31 and ready for the best year of your life? Looks like you are the perfect candidate for a one-year work and holiday visa in Australia!
I’ve put together a step-by-step guide on what you will need to do in order to obtain a work and holiday visa, as well as helpful information to get you set up once in Australia. When I was initially looking into possibly moving to the Land Down Under, I had a hard time finding helpful information on how to go about the whole process, so I figured a guide would be helpful!
Step 1: Applying for a Visa
There are a few different visas, but the one you are interested in (if American) is Subclass 462 – Work and Holiday. The rest of the world can apply for a Working Holiday Visa, which allows a visa extension when three months of farming work have been completed. Americans are not eligible for a visa extension (won’t get into that) hence why we have to apply for a separate visa. Click here to fill out all of the necessary information for obtaining your work and holiday visa (should take 15 minutes or less). My visa request was approved within a few hours! You will get an email with your electronic visa number, so there is no need for any passport stamps or paperwork. The fee for the visa is around $400, but is well worth it. And just like that, you can move to and work in Australia for a year!
Step 2: Getting Connected
Start reaching out to anyone you know who may have connections in Australia. Building a network of people before you get there will give you (and your mom) piece of mind so that if you need anything you’ll have someone local to contact. It also could lead to a job or a housing opportunity, but mainly it could lead to some awesome friendships. A friend from my hometown put me in touch with my now dear friend, Will, who not only picked me up from the airport and gave me his old iPhone to use, but took me to a BBQ where I met Jade, a lovely lady from Perth who essentially got me a job at an awesome cocktail bar in Melbourne. A different friend from home, Shauna, put me in touch with her cousin Rachael who ended up housing me for a few weeks while I looked for a place of my own. Rachel and her housemate, Isabelle, ended up being two of my closest friends in Melbourne! It’s always worth it to reach out and see what connections you might have. People are inherently good, and typically want to help a fellow human out!
Step 3: Finding an Apartment
First of all, do a little research on what suburb or part of the city you may see yourself in. I would start out booking a hostel for the first few days to a week while you explore the city and see what you like. I do not recommend locking in a place before you arrive, as you don’t know if you’ll like the neighborhood or the housemates! I initially thought I wanted to live in St. Kilda, but after visiting it, I decided it wasn’t the place for me. It took a little more time than I planned, but I found the perfect place in Fitzroy with some pretty rad housemates, and it was worth it! I used Flatmate Finder to find my flat, but Flatmates as well as Fairy Floss Real Estate on Facebook always had good apartments listed. I’ve heard that Gumtree (kind of like Craigslist) is also a place to look, but I had no luck with it.
Step 4: Furnishing Your Flat
I highly recommend utilizing Gumtree and Facebook groups for finding cheap or free furniture, and Kmart or Target for cheap linens. Most cities have Facebook groups where people are either selling or giving away unwanted furniture and other home items. I had the most luck with My Stuff=Your Stuff and Free Stuff Melbourne Facebook groups. Also keep your eyes peeled in Op Shops as well as stuff left out on the street! Melbourne is notorious for having amazing furniture left out on the street for free! Between using the FB groups mentioned, Gumtree, Op Shops and some very generous friends, I was able to furnish my bedroom for $40, plus all linens for about $90 (including a mattress pad, pillows, sheets, duvet &duvet cover and towels).
Step 5: Finding a Job
If you plan on getting a job in a bar or restaurant, I highly recommend that you get your RSA before handing out resumes. An RSA (Responsible Service of Alcohol) is required by every single establishment that serves alcohol in Oz. Something to be aware of is that each state has a different certification needed, so if you plan on staying in Melbourne you need a Victoria RSA, and for Sydney a New South Wales RSA, etc. Go in prepared with a well-constructed resume and an RSA and you have a better chance of finding a job. A good wage for servers in Melbourne is $21-$23 per hour. Don’t settle for $17 an hour at those touristy spots unless you really can’t find anything else! The best time to find a job in Melbourne is September or October, as most places are bulking up for the busy summer season.
Step 6: Setting Up a Bank Account
There are many good banks to choose from in Australia that have multiple branch and ATM locations, the most popular and accessible being Commonwealth, ANZ, and Westpac. I chose Commonwealth, and they were very helpful when setting up my account. Before you set up an account, you will need to apply for a Tax File Number. Click here to apply by filling out the information needed. You will also need to setup a Superannuation Fund (a mandatory retirement account), but the bank will help you with that as well! Money is taken out of your paycheck each week and is added to your Super. Australians are not able to touch this money until they actually retire, but travelers are able to apply for a 65% refund of this account once they leave the country.
Step 7: Getting an Aussie Phone Number
Similar to banks, there are plenty of phone service providers to choose from as well. The most popular are Telstra, Optus and Vodaphone. I popped a $2 SIM in my unlocked phone and added a pre-paid $30 monthly plan that gave me unlimited calls & texts within Australia, $10 of overseas calls and 1.5GB of data. This plan worked great for me, and the Optus mobile app was an easy way to recharge my plan each month. Just to note, I did hear that Telstra has way better coverage, but their plans are more expensive and don’t come with as many benefits.
If you’ve always dreamed of traveling Australia, but thought it was unattainable, it most certainly is not! I hope this guide has shown you just how easy it can be, and inspires you to take the next step towards a life changing adventure. Wanderluluu is all about turning travel dreams into reality!






2 comments
Name*
Great information. Well done LLK
Lauren
Thank you so much for the positive feedback <3